Saturday, October 27, 2012

Chocolate Raspberry Cheesecake Cupcakes

This recipe is from my sister's blog, so I will provide the link to the original recipe as well.  The only thing I changed is the graham cracker crust.  In Spain it's hard to find graham crackers, so I used what they call "digestive cookies," which are supposed to be healthy cookies for breakfast.  They taste very similar to graham crackers, and in the end may be the same thing just in a different form.  I also added a bit more butter and some low-fat milk to the crust mixture since I found it to be a bit dry with the "digestive cookies".  It is also quite difficult to find raspberries in Spain, so I had to skip that step and use blueberries instead.

Ingredients: 
20 "digestive cookies" or graham crackers
2 tablespoons room temperature butter
1/4 cup low-fat milk
2 packages of 8 oz. cream cheese
3/4 cups sugar
1/3 cup unsweetened cocoa powder
1 tsp vanilla
2 eggs (room temperature is best)
½ cup raspberry jam
(optional topping):
½ cup heavy whipping cream
1 tsp vanilla
2-3 tsp sugar

Preheat your oven to 350F or 176C.
Crush the cookies in a ziploc bag using a rolling pin (or meat mallet).


Mix them in a bowl with the butter and the low-fat milk.  I really eye-balled this step to see how much butter and milk to add.  Obviously, the more you add, the more moist it will be.  It really depends on how you like your cheesecake crust.


Mold the cookie mixture into cupcake papers pressing down with fingers.  Pop them in the oven for 5 minutes.


Now for the cheesecake part.  Empty your cream cheese packets into a mixing bowl and mix with a stand or hand mixer on medium until creamy(er).  Then add the sugar, cocoa powder and vanilla.  Mix until combined.  Add the eggs one at a time and mix until smooth. 

Now the fun part...using a tablespoon, fill your cupcake liners.  They shouldn't rise too much, so fill them until almost full, leaving space for the raspberry jam swirl.  Once full, add a dallop of raspberry jam to each cupcake and using a toothpick or chopstick (like me) swirl the jam around on the surface of the cheesecake.  Now bake for 20-25 minutes until set.


Take out of oven and let cool to room temperature before putting in the fridge for thirty minutes.  

To make the whipped cream topping, whisk together using electric mixture the following ingredients: heavy whipping cream, vanilla and sugar until thick.

Take cheesecakes out of fridge and using a icing sleeve decorate them to your liking.  

Sunday, October 14, 2012

Vendimia in La Rioja

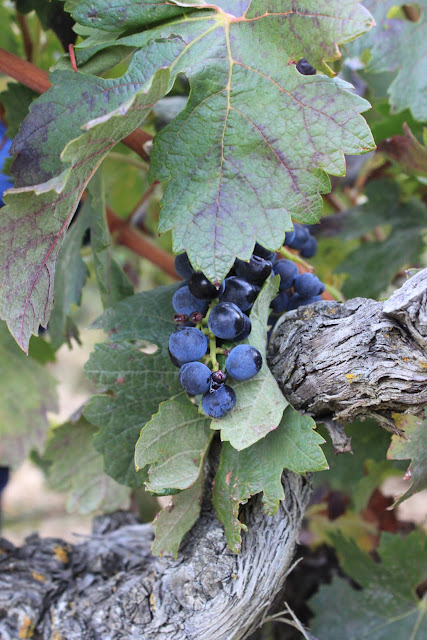
Fall has arrived in La Rioja, one of Spain's most important wine capitals.  La Rioja, home of delicious red crianzas and reservas, is now in its stage of vendimia, or grape harvest.  A drive through the rolling hills of La Rioja opens your eyes to green vines snaking their ways across, dripping with grapes of all shapes and sizes, colors and genres.  Below you will see a myriad of photos of my trip to bodega Valenciso, located just outside of a charming Riojan pueblo called Ollauri, in the Northwest of La Rioja.  The harvesting process begins in La Rioja in the beginning of October, but the higher the altitude, the longer you wait to pick the grapes.  Since Valenciso's vineyards are located at a higher altitude than many other bodegas, I was still in time to see (and taste) some of the grapes. We arrived to the bodega just as the sun was about to set, and were given a tour of the vineyard as well filled in on the history of the vines.  I learned that the oldest vines in La Rioja are 120 years old.  The ones we saw (pictured below) are 80-90 years old. 


These grapes are some of the best I've ever tried.  Imagine being able to pick up a bunch of wine grapes at the grocery store.  It's so normal here. They are so fresh and have a sweet, pure grape flavor.  


After a stroll through the countryside, we drove a short ways to the bodega grounds, where the winemaking process was beginning to take shape.  Below you can see a birds eye view of the tanks filled with grapes, being squished and filtered.


We were then given a tour of the reserve wines, in barrels...as well as a bottle of wine larger than the average female.  Below is Javi's mother and her friend Estrella.


Welcome to the home of over 150 wineries living amongst 123,000 acres of planted vineyards.  Vendimia in La Rioja dates back to the Phoenicians and Celtiberians, with the first written evidence of grapes in the form of a Public Notary document to the Monasteries of San Millán de la Cogolla (pictured below).  

View of Monastery de Yuso in San Millán de la Cogolla.

During the medieval times, monks were the main producers of wine in La Rioja.  Wine was mentioned by one of Spain's earliest poets in his works, and in 1102 the King of Navarra and Aragon legally recognized Rioja wine.  From the 17th century onwards, Rioja's society has promoted the cultivation and comercialization of its wine.  In 1991, La Rioja became Spain's first region to be awarded with the nomination deeming its wine "calificada".  It is now required that all Rioja wine's wear a label classifying it under a "Denominación de origen calificada" (a qualified denomination of origin).  
Look for this stamp on Spanish wine to know that it has been nominated of "Denominación de Origen Calficada".  Top left is for wines from 2007, a typical, younger tinto, or red wine.  Top right is for wines from 2005, or crianza wines.  Bottom left is for wines from 2003, or reserva wines.  Bottom right is for wines from 2001, or gran reserva wines.  They are in order of age and usually, price. Stay tuned for more visits to Bodegas in La Rioja!

Lighter Chocolate Chip Peanut Butter Cookies

I woke up to a lazy Sunday morning in the mood to be a little less lazy and bake something...seeing as I haven't in a couple weeks.  My boyfriend Javi has been pestering me to make peanut butter cookies for about a month but in hopes of being healthy I have been steering clear of such obviously caloric recipes.  So I made a compromise--a lighter version.  Now, you may take a quick scan at the ingredients and wonder how can canola oil and brown sugar ever be light, but I swear to you that each cookie has 128 calories, which I assure you is much less than the norm.  Anyways, enjoy this mixture between a classic chocolate chip cookie and a peanut butter cookie, whether you're trying to lose weight or not...in the end it's always about moderation (and this tends to be my problem).


Ingredients: (3 dozen cookies)
1 cup granulated sugar 
1 cup
packed brown sugar 
1/2 cup
creamy peanut butter 
1/4 cup
water
1/4 cup
canola oil
2 teaspoons
vanilla extract
2
large egg whites 
1
large egg 
12 ounces
all-purpose flour (about 2 2/3 cups)
1 teaspoon
baking powder
1 teaspoon
baking soda
1/2 teaspoon
salt
2/3 cup
semisweet chocolate minichips (I ran out so I chopped up some 68% cacao valrhona chocolate...not too shabby)

Preheat oven to 350°F or 176°C.
Measure out granulated sugar into a large bowl.
Add the brown sugar.
And the peanut butter.
Then the water and canola oil.
And the vanilla.
And the egg whites and egg.
Mix until creamy with your hand or stand mixer.
Measure out flour into a medium sized mixing bowl.
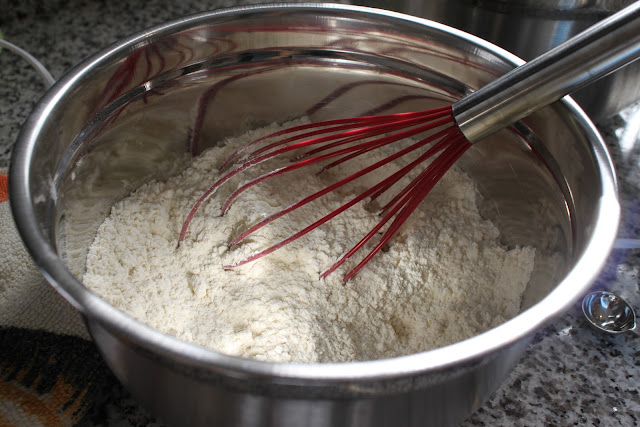
Add the baking powder, baking soda, and salt.
Mix with a whisk.
Gradually add the flour mixture to the peanut butter mixture.
Mix with spatula until just combined.
Chop up your chocolate if you are using baking chocolate and not chocolate chips.
Add the chocolate pieces.
Mix in well.
Spoon out tablespoon-sized balls of batter onto a baking sheet.
Bake at 350F or 176C for 12-13 minutes.
Take out of oven when golden brown.  Let cool for a few minutes, and enjoy!